|
 |
|
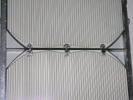
The cells are soldered in series. Both the + and - contacts are on the back. We used tinned copper ribbon as our interconnects. A jigging system allows us to solder strings of up to 6 cells at a time, aligned 2 mm apart.
|
|
|
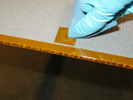
The solar panels use the same honeycomb panel material used in the chassis as a substrate. Threaded inserts are added to provide secure mounting locations. Here, one sees that the edges are sealed with Kapton tape, and that the front-side opening of the threaded inserts are also covered with Kapton tape, so that silicone will not enter them.
|
|
|
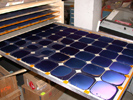
A first layer of silicone is poured over the substrate and, while it is still wet, strings of solar cells (6 cells soldered in series) are laid into the silicone. This first layer is left to cure up for 24-48 hours.
|
|
|
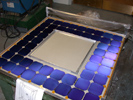
The first layer of silicone and solar cells for the top panel, which required some special jigging to produce.
|
|
|
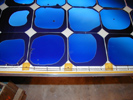
To connect one string of cells to the next, more of that copper ribbon is used. Also, the ribbon is used to create a large contact pad for external wires. In between the first and second layers of Sylgard silicone, these bus connections were made, shown here, then a second layer of silicone is poured over top of them and the cells.
|
|
|
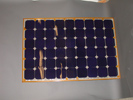
Once these final electrical connections have been made, a second layer of silicone is poured over the top of the cells, encapsulating them and the copper ribbon. This layer is also left to cure for 24-48 hours. Because of the long cure time, and the corn-syrup-like viscosity of the silicone when liquid, the surface finish of this layer is very smooth and glossy, as one can see here.
|
|
|
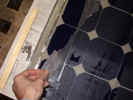
To prevent the top surface from reflecting a lot of light from its smooth surface, one of the test panels had its surface stippled, like frosted glass, by making an imprint of a teflon-coated fiberglass fabric on it. Unfortunately, this procedure did not scale up to the full-sized panels, where the top coat was too easily peeled away from the 2nd layer of silicone, as shown here.
|
|
|
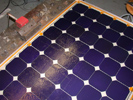
The silicone, under the influence of gravity, would cure to a smooth, glossy surface that would reflect significant light. Because the stippling procedure did not scale up to the full-sized panels, a process we term active texturing was used to provide some roughness to the final silicone coat.
|
|
|
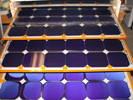
Three solar panels at various stages of construction.
|
|

|
Finished hubs CNC'ed from 6061-T6 aluminum.
|
|
|
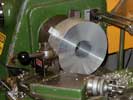
Each wheel was made of two halves. Each half started as a 9" diameter x 4" thick solid billet of 6061-T6 aluminum. In the end, 90% of that billet got machined away.
|
|
|
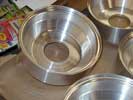
With the blanks bored, faced, and turned to diameter by hand, they were mounted on the CNC lathe. The first operation formed the outward-facing contour.
|
|
|
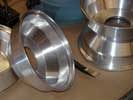
Next, the partially-finished halves were flipped around in the lathe and gripped from that just-finished outside contour, so that the inside contour could be machined. The finished wall thickness was just 0.1".
|
|
|
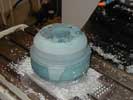
Lastly, the tab pattern and bolt holes had to be milled and drilled. In order to firmly hold the contoured wheel half, a solid foam form was made to match in outside contour.
|
|
|
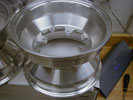
A completed wheel made of two CNC'ed halves. Using a custom wheel design and construction saved about 10 kg from the overall robot weight.
|
|
|


